How to use Recon-ng Framework for information gathering
Recon-ng is a command line tool available in the Linux system, that is used for various types of information-gathering techniques.
It is a Python-based framework with an independent module and a database to provide an environment for open-source web-based footprinting or reconnaissance.
Recon-ng can be used for gathering information about our target domain through web-based reconnaissance techniques because it has so many modules, database interaction, built-in convenience functions, interactive help, and command completion.
It has its own powerful environment in which open-source web-based reconnaissance can be conducted, and an attack can gather all the information about its target organization.
Some Uses and Features of Recon-ng
It can be used for gathering information about the many things that include
- IP Addresses
- Finding sensitive files such as robots.txt
- finding error-based SQL injections
- Geo-IP lookup, Banner Grabbing, DNS lookup, Port scanning, subdomain information, Reverse IP using Whois Lookup.
- can detect the CMS (Content Management System) of the target domain
Features
- Free and Open Source OSINT tool
- It has a complete package of information-gathering modules.
- Similar to metasploitable 1 and metasploitable 2 that makes it easy to use.
- It can easily find loopholes or vulnerabilities in web applications and websites.
- It uses the Shodan search engine for scanning IoT devices over the internet.
How to use Recon-ng
Recong-ng will be mostly pre-installed in your Linux system like the Kali Linux Operating system. If it is not over there then you can simply install it from its GitHub repo by following simple instructions of installation.
GitHub Repository Link of Recon-ng
1. After installation simply run the command [recon-ng] in your Kali Linux terminal for running the program. It will appear as shown in the screenshot below
2. If you see some error while running the tool for the first then ignore it the error is generated because of API key is not found we need to set all the application API keys for the query but for this tutorial ignore it.
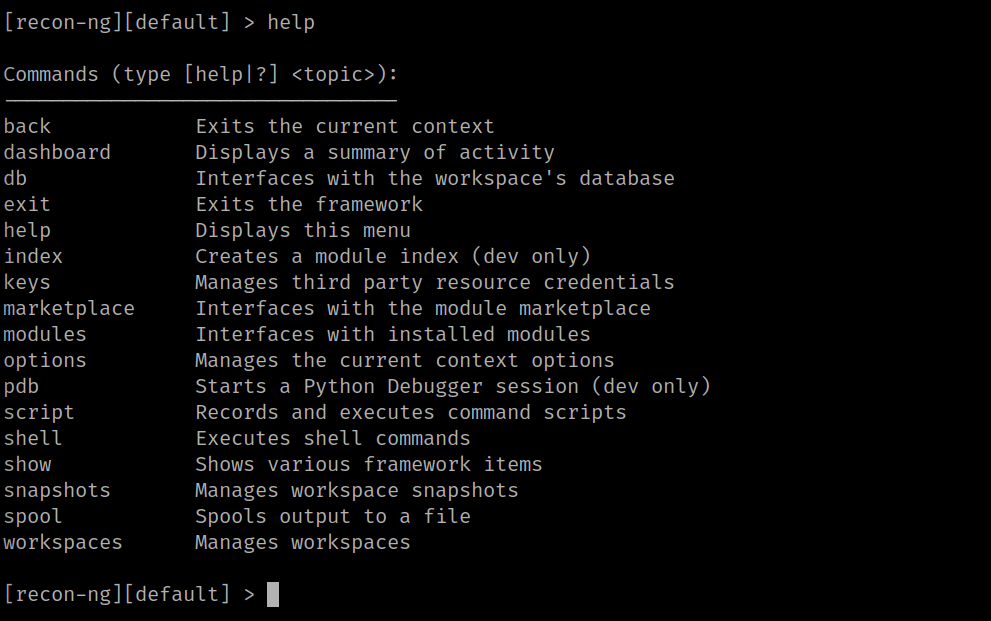
3. After running the tool type [help] command then it will show you all the options and commands for operating with the tool.
4. Now we need to install all required modules for our practice section. for installing all the modules of recon-ng enter this command [marketplace install all]. Ignore all the errors generated related to the API key
5. after installing all the modules you need to display all the modules inside the recon-ng. so to search the modules enter this command [module search]. This command will display all the modules available in the recon-ng tool.
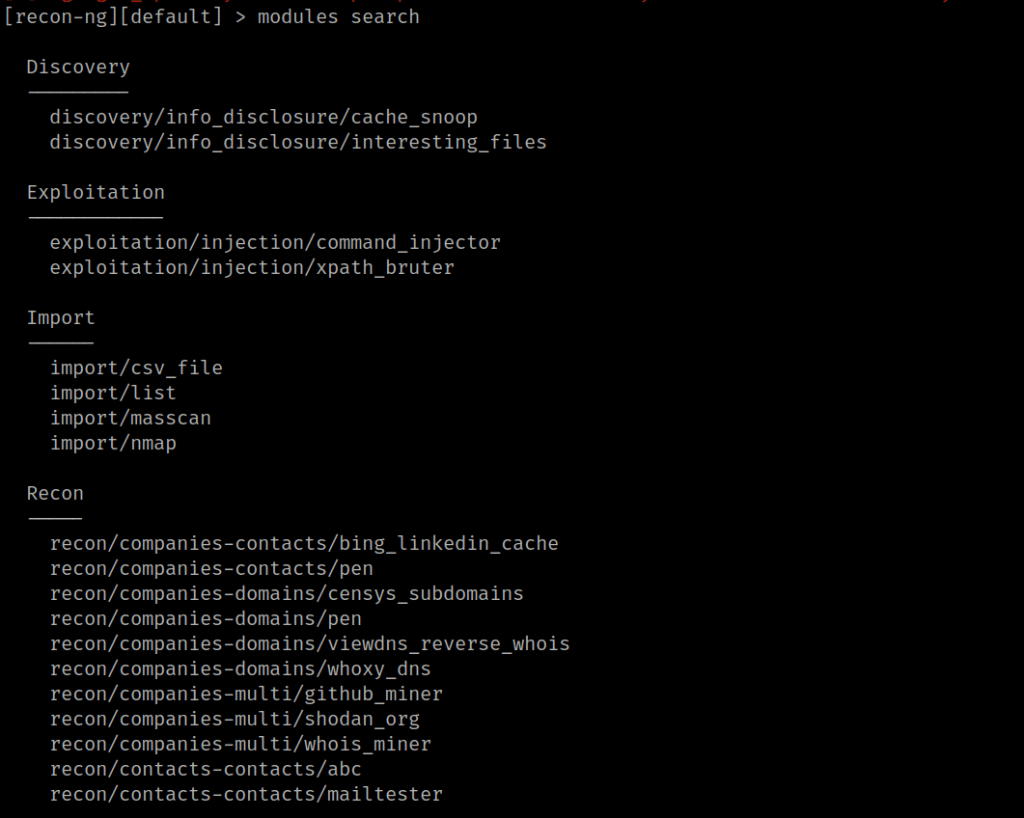
6. this will show up all the modules of the recon-ng tool. these modules can perform network discovery, exploitation, reconnaissance, reporting, etc.
7. We need to see and create workspaces for performing network reconnaissance. First type the [workspaces] for managing the workspace. Then For creating workspaces type the command [workspaces create practice].

8. Now it will create a workspace called practice. For displaying all the workspaces type the command [workspaces list]
9. Now we need to insert the domain name which we want to perform network reconnaissance.
10. For inserting the domain enter the command [db insert domains] Press enter and then add your domain name in domain (text), in notes (text) you can any alias and then press enter.
11. Now for checking all the inserted domains, type the command [show domains] and it will show the list of the domains you inserted.
12. Now we need to load the module for gathering information associated with testfire.net. for gathering hosts related information we need to load network reconnaissance modules such as brute_hosts, Netcraft, and Bing.
13. For loading modules type the command (modules load [module-name]). I need to load the brute_hosts module for that [modules load brute].
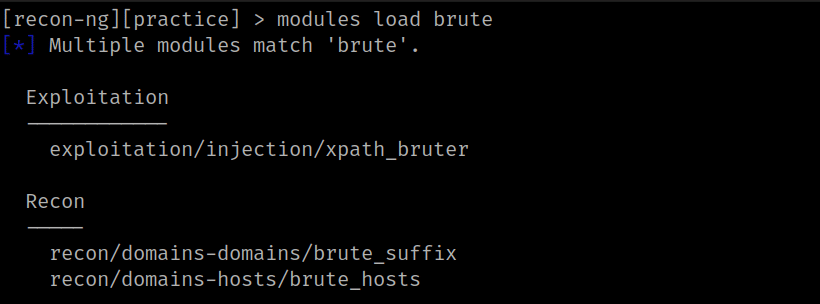
14. here we need to specify that which brute module we need to load so for that type this command [modules load recon/domains-hosts/brute_hosts]
15. All the pre-settings are completed now we need to run the module for information gathering. For this type the [run] command.
16. We have gathered host-related information on testfire.net by using a brute module. now we are going to use other modules for different information we can gather from the host.
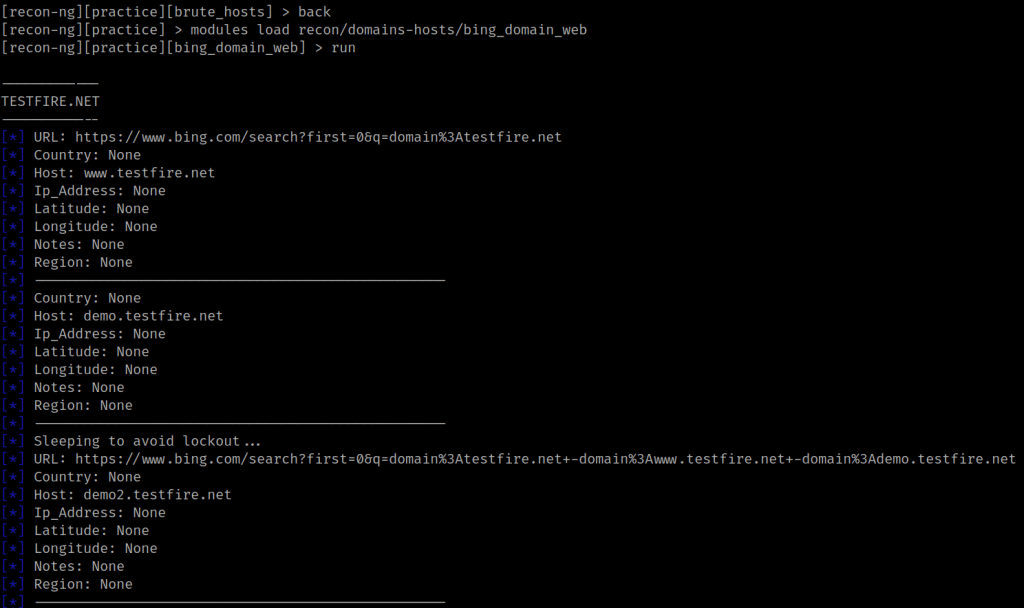
17. Use the [back] command to go back to our workspace attribute terminal. And then load the Bing module for resolving hosts by using the following commands
[back]->[modules load recon/domains-hosts/bing_domain_web]->[run]
18. Now, we should perform a reverse DNS lookup for each IP address that is obtained during the reconnaissance process to resolve the respective hostnames.
19. so for reverse DNS lookup we need to load the reverse-resolve module for that type the command [modules load reverse_resolve]. Now it will show all the associated modules of reverse_resolve. So from all, we will use the recon/hosts-hosts/reverse_resolve module.
20. Now load the reverse_resolve module and run the query for reverse lookup by following commands.
[back]->[modules load recon/hosts-hosts/reverse_resolve]->[run]
after this enter the [show hosts] command, and it will display all the hosts that are gathered so far.
21. All the things we need are done, now we need to prepare the report for the information we gathered from the host by using reporting module.
22. Again type back command and type [modules load reporting], It will show all the reporting modules available in the recon-ng tool. So in this tutorial, we will save the report in HTML format, so we will use reporting/html module.
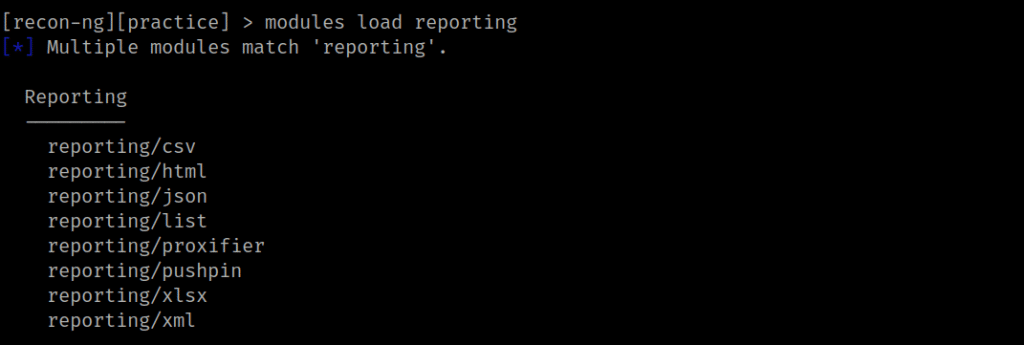
23. For reporting in HTML type the command [modules load reporting/html] and press enter. now here we need to set some values for our result and reporting files.
[options set FILENAME /home/kali/Documents/recong/results.html], This command will set the result filename and file path
[options set CREATOR (your-name) [here, cipher]], this will assign a file creator name as a cipher.
[options set CUSTOMER testfire networks]. This is because we have performed all the attacks against testfire.net, so they will show up as our customers. and after all this run the module
24. check the generated report by navigating to the destination you created for the reporting. Open the report in the browser and see the overall report for the practice workspace.
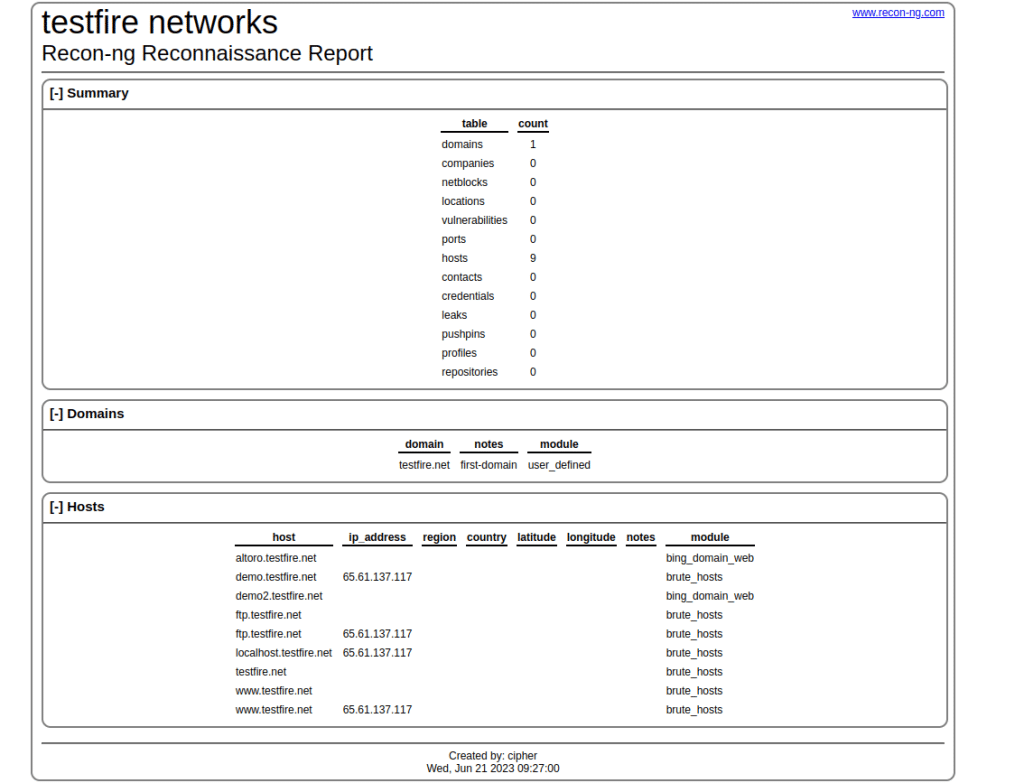
This is how we can use the recon-ng framework for the information-gathering phase. It has many more modules and another step you can go through for getting different information about your target organization.
This is the first part of the recon-ng tool for gathering organization information now in the second part we will use recon-ng for gathering personal information of the employees of the organization or any individual person.


